
Editing consistency is important if you want to establish your own particular style. I know everyone’s style is different, and mine is on the light and airy side. I like to use film, digital and my phone for taking photos and want the same style to be reflected through my images on all mediums. Over the last several years, I have found some practices that have helped me define my style. No matter what type of camera I am using, light is most important. It is important to keep the background in mind while shooting. Personally, I love bright images so I do my best to use lighter or neutral backgrounds. I also shoot in Kelvin so I can control the temperature of my images in camera. As a pro photographer, when it comes to editing, Lightroom is my go-to. Here is my guide to using this great platform.
Platform:
I try to keep my editing simple, so I primarily use Lightroom and only use Photoshop if I have to clone something really difficult. If I do have to bring an image into Photoshop, I use the shortcuts: Command+E to send to PS and Command+W to send it back to LR.
Culling:
I cull my images in the Library module in LR. I use Command + up arrow ⬆️ to flag the images I want to edit. To group images further, you can Star your images using the numbers 1-5. The numbers 6-9 assign a color to the image if you like to categorize by color.

To switch from the Library module to the Develop Module, just hit D. There are so many LR shortcuts! You can google your version of LR and there are tons of downloadable PDFs!
Basic Panel:
I usually straighten and crop first. I either start with a preset (my favorites are Mastin Labs), or start making adjustments in the Basic Panel. Contrast and Exposure have an impact on the overall color of an image. I will decrease contrast a little if the image looks too orange, or increase/decrease exposure to get the right amount of warmth if I do not want to add more yellow or blue with the Temperature slider. If the color still looks off, I have found that often the Tint needs to be adjusted. Moving the green/magenta slider a little sometimes makes all the difference!

Skin Tone:
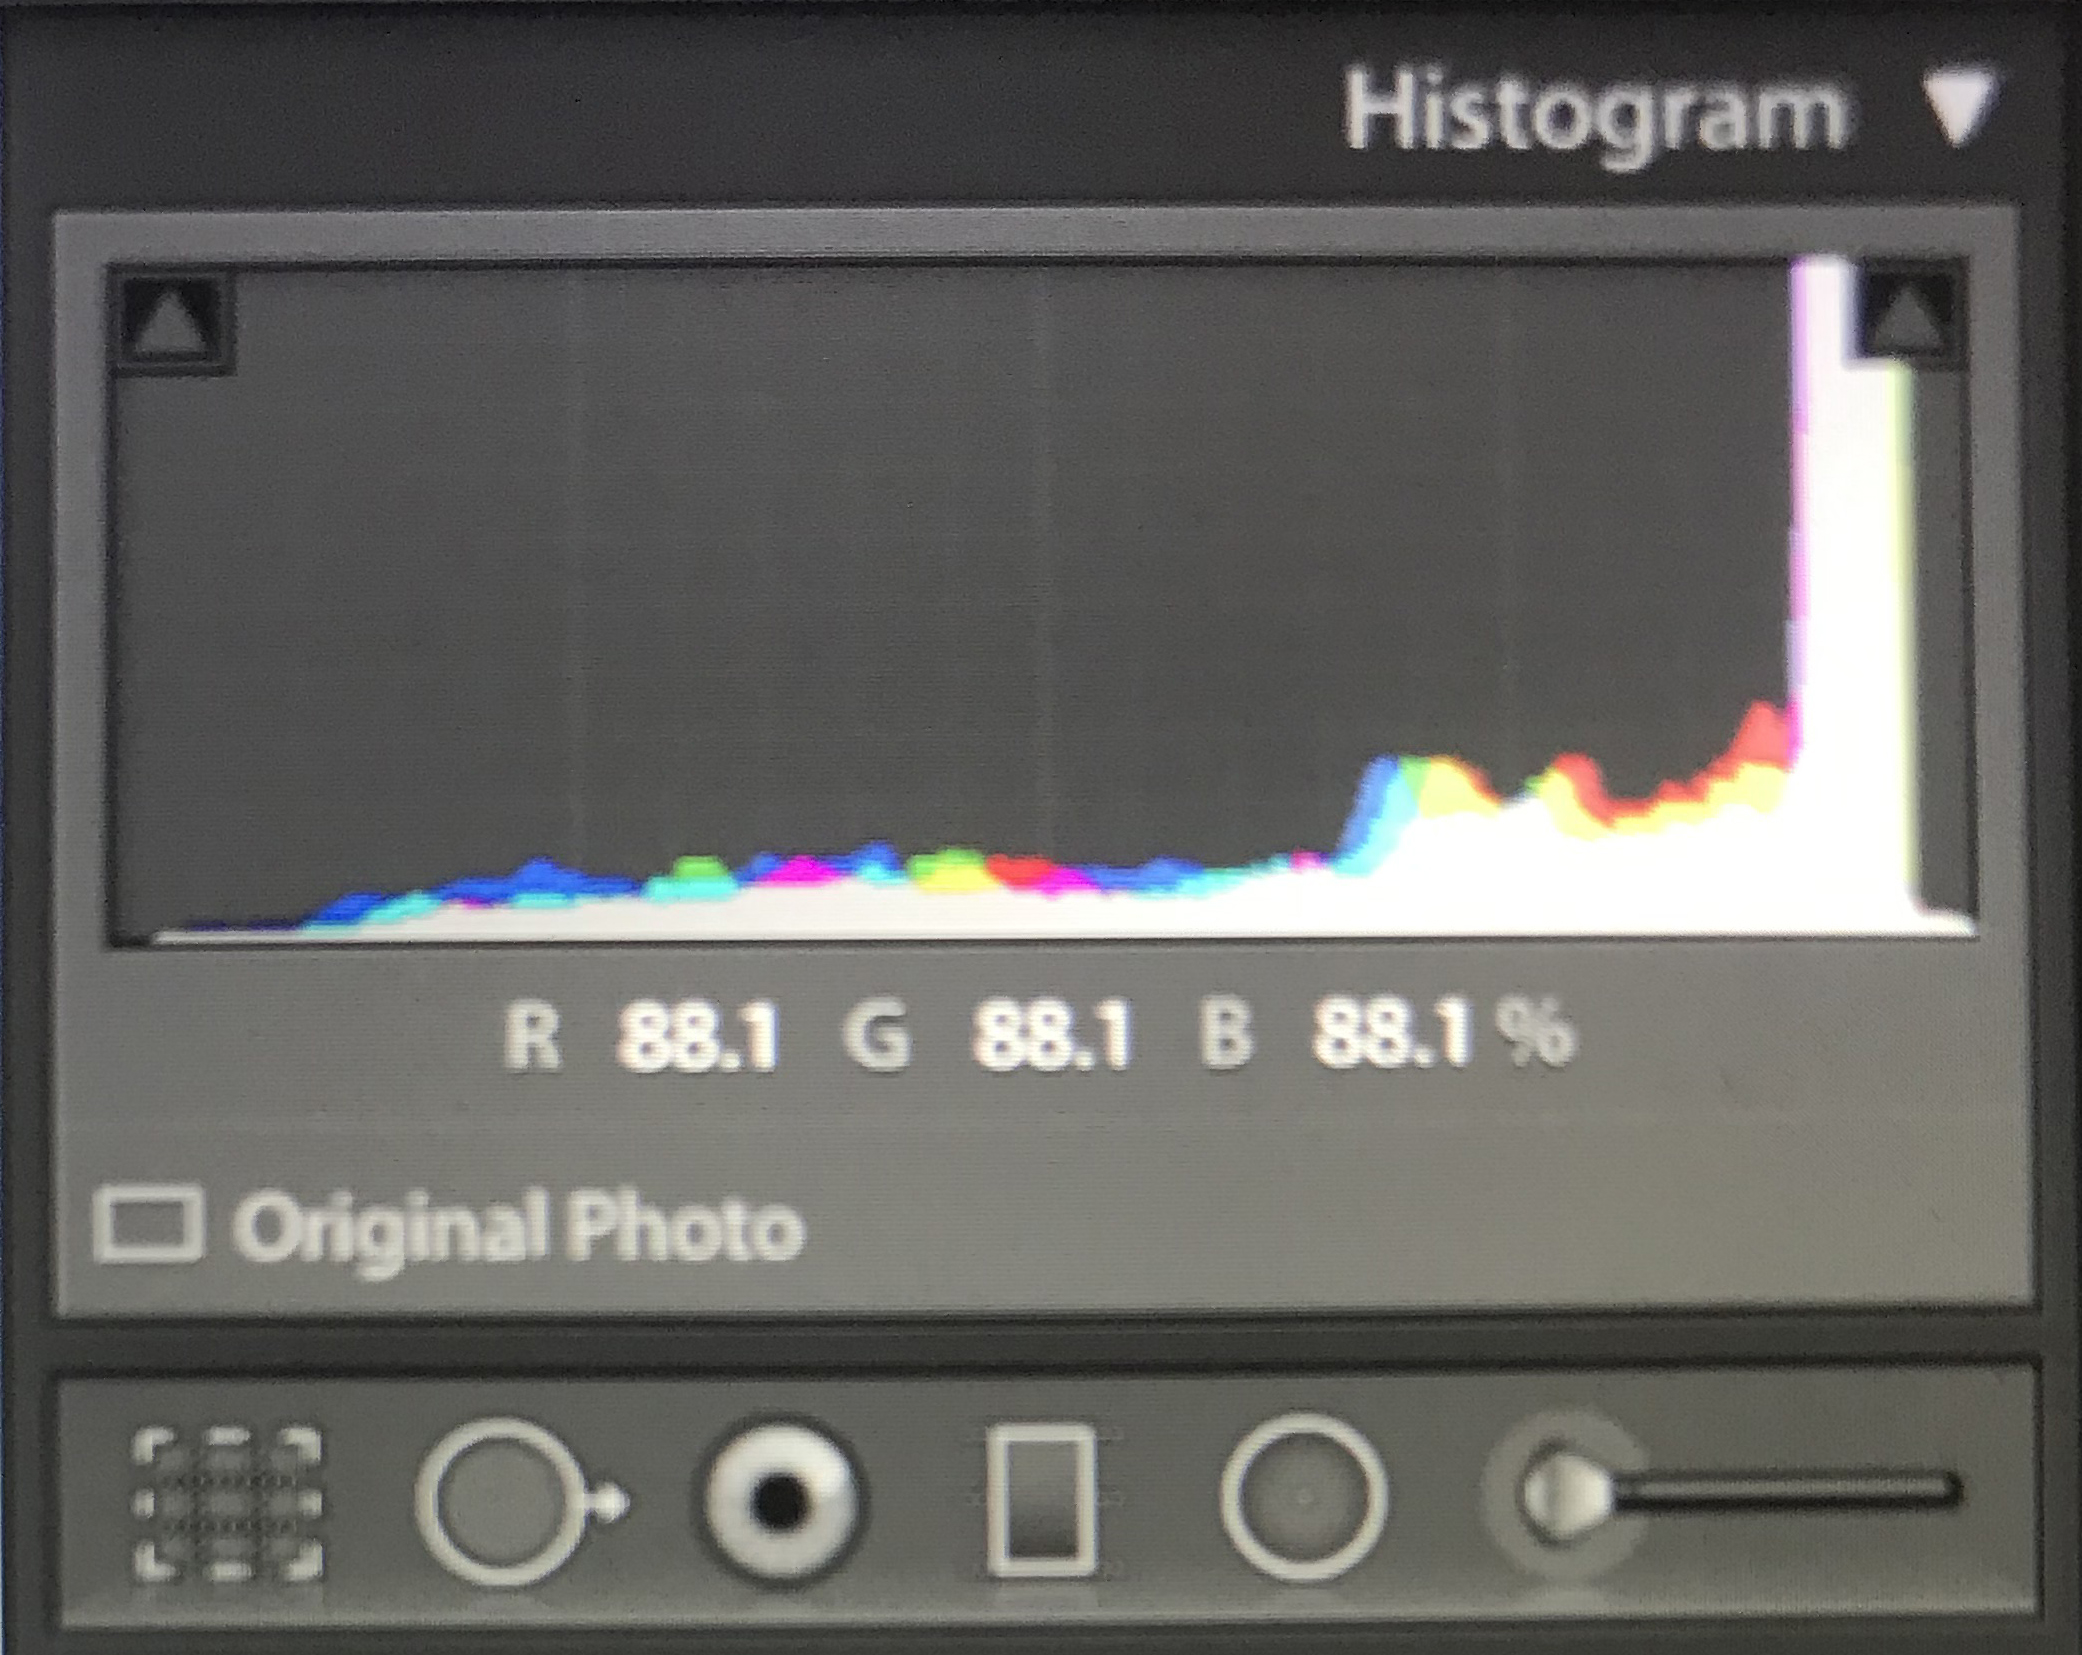
Obtaining good skin tone colors and true whites are also important for my editing style. I can usually eyeball the skin tones pretty closely, using the Temperature and Tint sliders. holding my cursor over something white on the image is usually helpful for me. I get close to a true white when the same value for each of the colors – red, green and blue – appear on the part of the image that was white.
If you have not played around with the HSL/Color sliders below the Basic Panel, I would highly suggest trying those out! I use these sliders to calm down fluorescent green or yellow grass, brighten skin, and remove color casts among other things.
Split Toning:
Split Toning can be helpful if you want to add some color to the overall Highlights or Shadows of an image. You can also use this to warm up skin tones along with the Temperature and Tint sliders. Split Toning will add color to the Highlights or Shadows, while the Temperature and Tint sliders add color to the overall image.
The Noise Reduction slider is helpful if a high ISO was used while taking a photo or if you heavily increase Exposure while editing the image. This slider will smooth out the resulting grain from making the image brighter. If too much is added, this slider will flatten the image. Be careful with how far you slide it to the right.
Exposure:
I use the Brush tool when I need to add extra exposure to faces or small areas of the photo. If you use it at .15, that little bit of extra Exposure still looks natural. The Gradient Filter is useful if one side of an image is too dark or light for my taste.
Spot Removal:
The Spot Removal tool is also very useful. Click on it, highlight what you would like to remove from the image and move your cursor over an area in your photo that will match that part of the image. I prefer this over moving my image to Photoshop whenever possible.
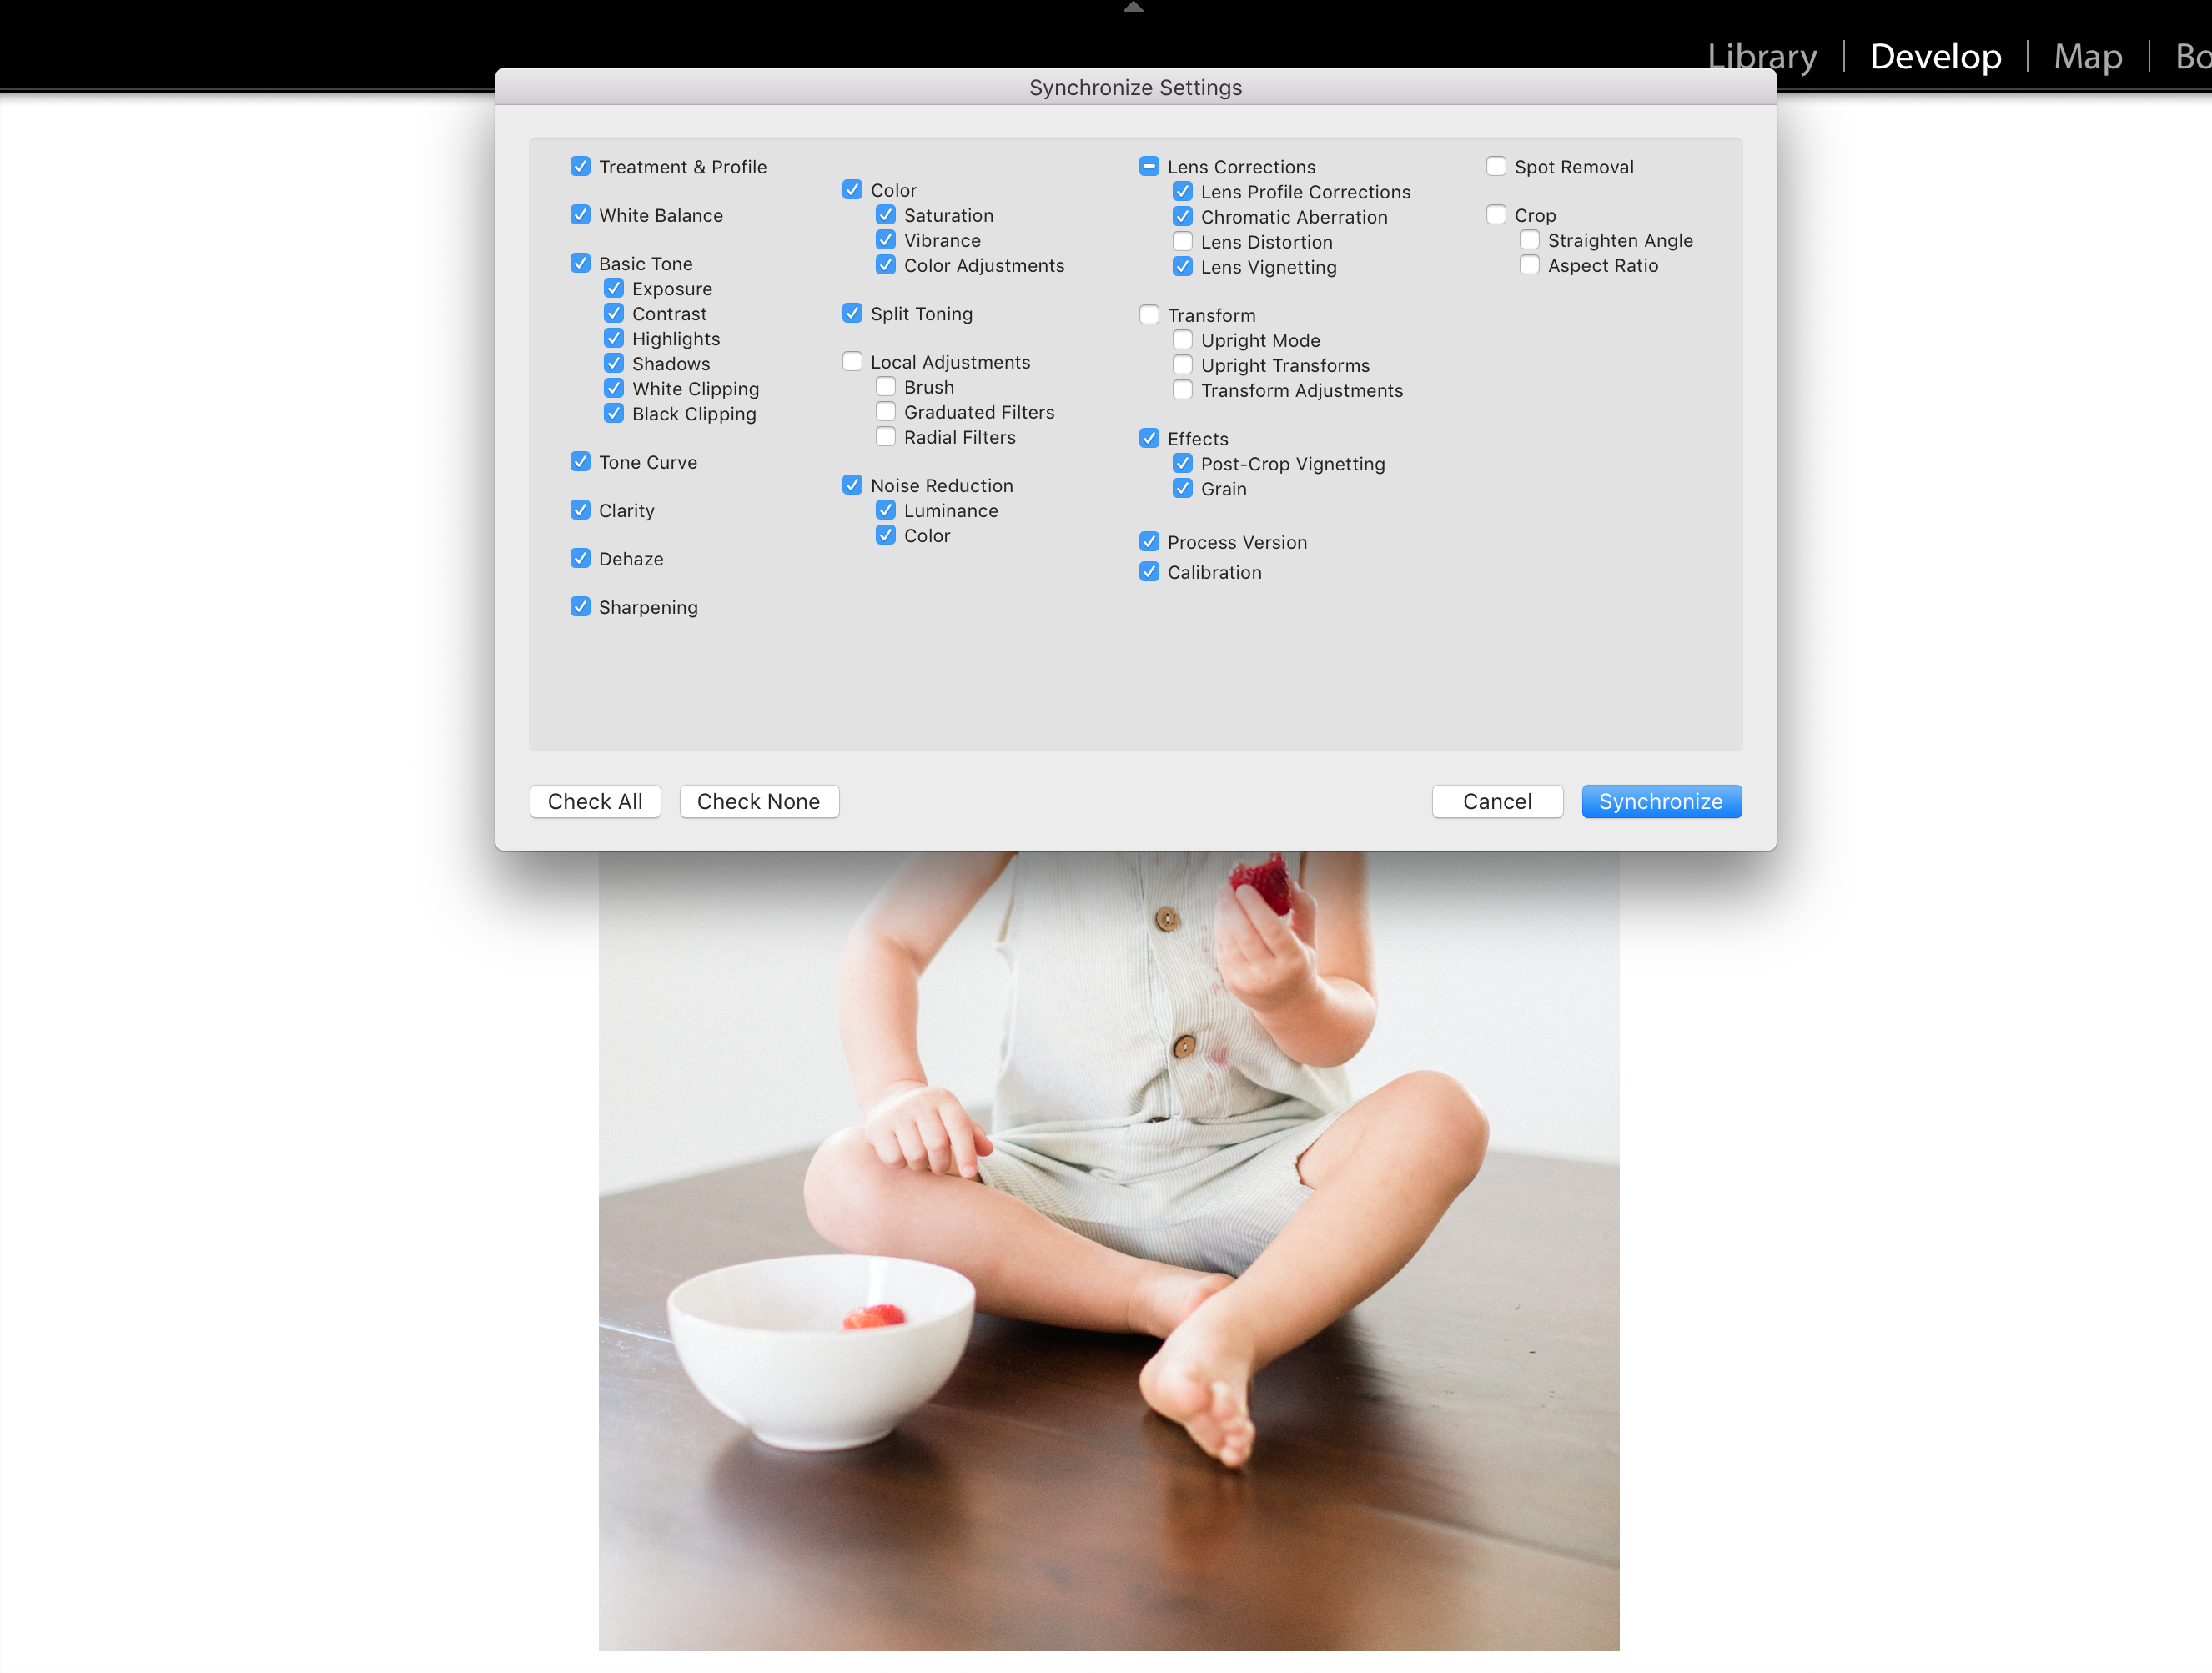
One of my favorite LR features is the Sync button. I use this to sync my edits to all the images shot in similar light. This saves so much time!
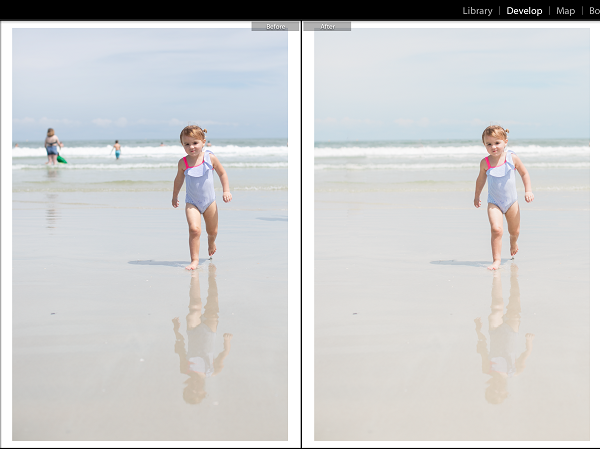
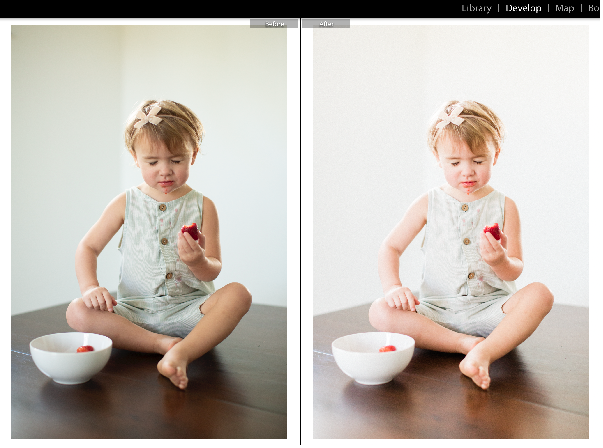
Before and After:
To see a Before and After of your edited image, hit the Y key. Hit Y again to go back to normal view.
There are so many other things you can do in LR. My best advice is to explore each of the panels. Learn about all of the options that are available to you. You may find something new that speeds
up your editing workflow!
About the Author: Cassandra Boryszak, Rooted Love Photography

I’m a natural light photographer who shoots lifestyle portraits in Florida and Western New York. My goal is to provide a fun experience while capturing beautiful memories with genuine emotion and a natural feel. I use both film and digital mediums, and try to emulate the timeless look and gorgeous colors of film in all of my work.
Check out the latest from the Artsy Blog:
- Father Photogs We Love to Follow
- How to Create the Most Photo-Friendly Wedding Reception
- Wedding Photography Composition Tips
Want more from Artsy Couture? Register for your Artsy Couture account today to stay up-to-date on our latest blogs, sales, and partnerships!