
One of the scariest topics when it comes to the field of photography is lighting. But, I didn’t come here to share a scary campfire story. Lighting is like the monster under the bed when you were growing up. Deep down inside, you know nothing is there but you are still unsure so you hide under the covers until morning. Most of the time when photographers are afraid of lighting they will often use phrases like “I am only a natural light photographer” or “I only have sessions at golden hour.” We have all been there and even to this day, some sessions I still only photograph close to sunrise or sunset. But the rest of the day, I am photographing in my studio, some with natural light and some with off camera flash.
So what is my point? Regardless of where you are shooting or what light source you are using… the bottom line is that light is light. The only thing that changes is your light source. If you are just a natural light photographer, guess what? You still need to know lighting patterns and what your light source is doing to your subject.
Now let me clarify; there is nothing wrong with natural lighting, it’s beautiful and it’s available and ready for the taking. The downfall? What happens when there isn’t enough natural light? What about when you are photographing a wedding party at noon? Or when you walk into a bridal suite and it looks like a bomb went off in there? You can actually use your knowledge of lighting to fix all of these scenarios and walk away a hero. Another bonus to mastering lighting is you have separated yourself from all of the other photographers going into business overnight. Knowledge of lighting is one of the most important things you can do for your business.
So where do you start? There are six lighting patterns that you should ultimately master but we are going to start with an easy three for you to practice. You will see a huge improvement in your work when you are constantly using anywhere from one to three lighting patterns in every image you take.
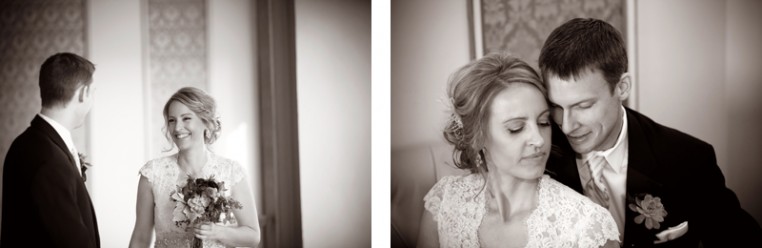
- Short Lighting {or Loop Lighting}: This is the most flattering light you can use on your subject. In basic phrasing, short lighting is turning your subjects face slightly into your light source. You achieve beautiful catch lights in the eyes and all of the facial features are beautifully highlighted while creating shadowing along the side of the face. It is very slimming and a lighting pattern that will instantly make your clients love their images, yet they will not be able to tell you why. You will make them look great, which makes you look great.

- Broad Lighting: Broad lighting isn’t technically a lighting pattern but a style. It is still important to know because it is the opposite of short lighting. In short lighting, where your subject is turned into the light, broad lighting is turning your subject slightly away from the light. The broad side of your subject’s face is now lit {hence the name}. This lighting style will make your subject look wider, so I recommend not going out and photographing your brides with this lighting style {unless she is extremely thin and has told you that she wants to look bigger}. I typically use this on males, especially if they are with their bride, as it gives a strong feel to the photo.

- Rim Lighting: This is your back lighting. When your sun is setting, your light source is in the back third of your shooting space. Rim lighting highlights your subject and helps remove them from the background. This is a common theme in natural light photos, more specifically when they are close to sunset. But, what if you set up one or two off camera speedlights in the back of a reception while you were photographing the dance? Your images have now gone from a well lit subject with a black background to a well lit subject balanced out with ambiance in the background. Your clients will love you.

*Photographing details {Bonus}: When you are photographing details at a wedding… guess what? You probably want to actually show as much detail as possible. We all know how difficult it can be to photograph a fully white bouquet, as it can show up as a big white blob. That sure won’t make the bride happy down the road, and it really will not make the florist happy if you are trying to network with them. This small trick will make everyone happy… do not light your details from the front, but from the side. This applies to all details, the flowers, cake, shoes, jewelry, hairstyle… you get the picture {pun intended}. The contrast between the light and shadows will showcase beautifully the details that everyone wants to see. Try it and be amazed {bonus points if you pair it up with rim lighting}.
So, you should be using these throughout your weddings {or portrait session} but if you really want to wow your clients at a wedding with very little effort, try setting up one or two speedlights in the back of the reception room on manual and pointed back at you. Watch your reception room turn from dark and dank in your images to full of life and amazing to your clients. The great thing is that there are a ton of cost friendly options that will get you started with this. You can get a set of triggers and two off brand speedlights for receptions for under $300.00. Investing this small amount and mastering this technique alone will allow you to increase your pricing and turn that initial investment into profit!
Now it is your turn to practice. I literally set up my lighting in my living room and practiced on my animals or their toys. It is amazing what you will be able to create!
– Jes {Mad Chicken Studio}

![]()
